Internal
The “normal” playlists that nest among each other. Internal playlists can only be assigned to one playlist and not to a device.
You will need access to our CMS to create digital signage playlists. Just register if you haven't already. There are no costs, and you won't receive spam, annoying newsletters or sales calls. I promise!
At SmilControl, we organize our media content into so-called playlists. In abstract terms, these are “folders” or “containers” that contain media elements such as images, audio, and video. In addition, our playlists can be nested within each other. This enables you to structure your presentations clearly.
The article shows how to use SmilControl-CMS to create a simple master playlist and assign it to a digital signage player. Furthermore, you will learn the different playlist items that can be inserted and the differences between the types: Master, Internal, Multizone, etc.
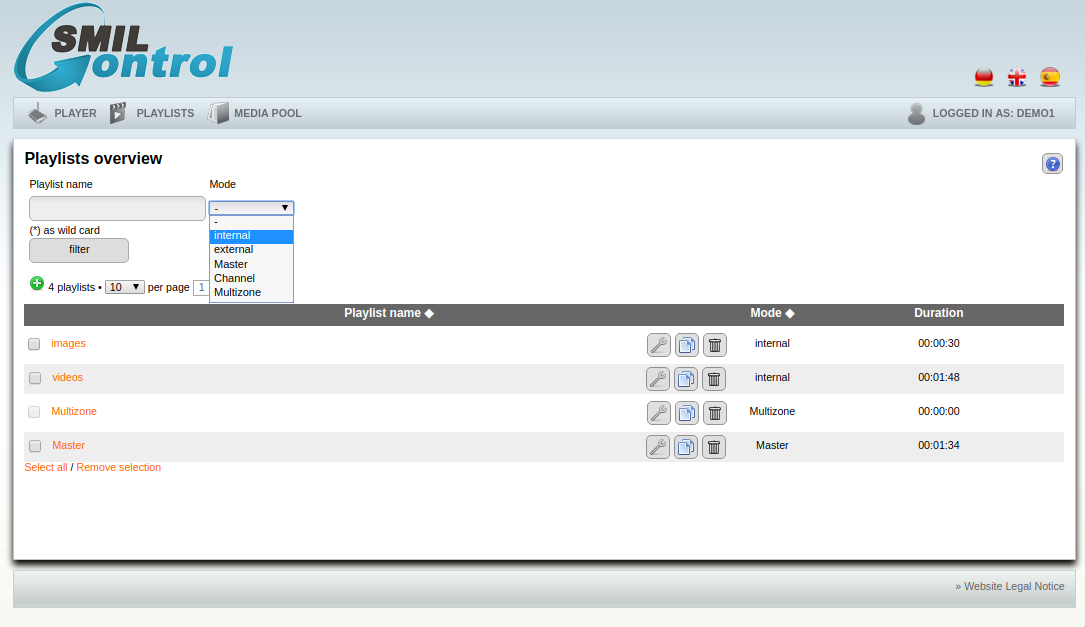
You can reach the overview via the Playlists menu item. There you will find all playlists to which you have permission. These can be filtered and sorted by name and mode/type. Furthermore, you will find editing functions like editing, copying, deleting, multiple nesting etc. there. You create a new playlist by clicking on the green plus.
Digital signage playlists differ from conventional playlists such as in the VLC player or Winamp in that they contain a lot of additional information. For example, how often individual elements are repeated; at what times certain media are played, and much more.
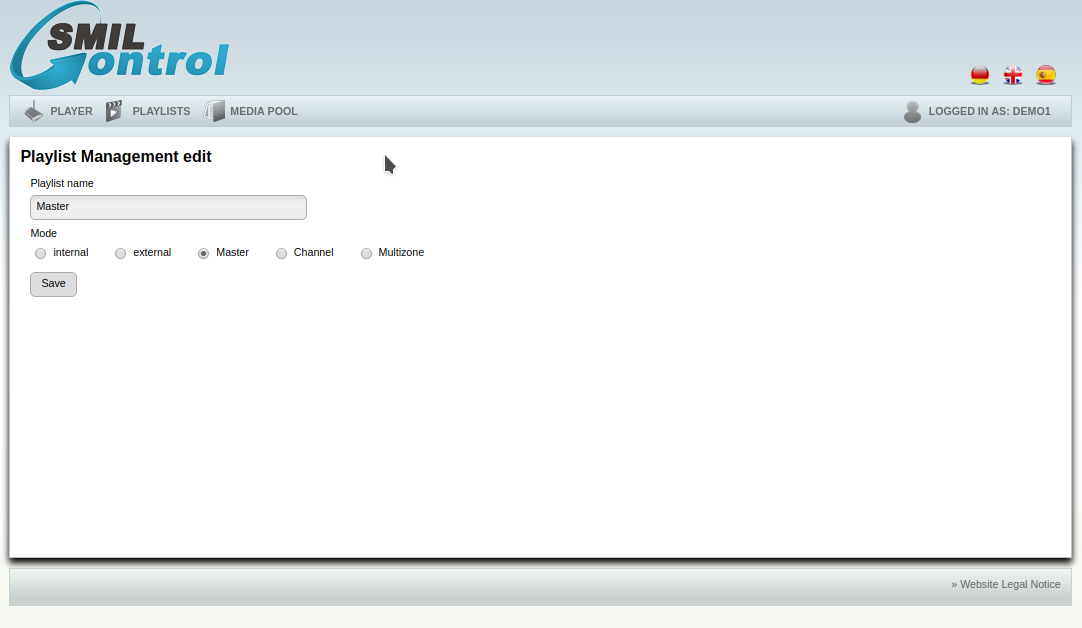
Here you set names and properties. A SmilControl playlist divides into five types/modes:
The “normal” playlists that nest among each other. Internal playlists can only be assigned to one playlist and not to a device.
We refer to master playlists as playlists that are assignable to a player. They also can be filled with content “internally”, but they are not nestable. A master playlist may also act as a zone of a multi-zone playlist.
Our pharmacy customers use this feature extensively. The daytime playlist continues to be used outside of opening hours in a scaled-down form as part of the emergency service display. Thus, while the currently open pharmacies in the neighborhood keep displaying full-screen, the program continues to run in an overlapping zone at the bottom right. This eliminates the need to duplicate the main program in a day and night presentation.
A multi-zone playlist divides the available screen space into several areas. These can even overlap. As soon as you select the Multizone mode, a setup appears underneath to define the number, position, and dimension of the respective zone. This can be done either relatively in percent or absolutely in pixel values. A multi-zone playlist can be assigned directly to one or more media players, just like a master playlist.
Screen zones maximize the utilization of a digital advertising space.

Channels are what we call internal playlists that are used as editorial channels in channel management. Only administrators are allowed to process playlists marked in this way.
In this case, the “playlist” simply is an Internet address to a SMIL-compatible digital signage playlists on external servers. This allows you to integrate and manage third-party playlists.
To keep within the scope of this tutorial, I will limit this to creating a simple master playlist. Click Master, enter any name you like, and save the new list. Next, you'll see the Content Editor, where you assign media items to the freshly created playlist.
If the playlist already exists, and you have subsequently changed the name, the content editor will not open after saving. In this case, you will get to the playlist overview. You can reach the content editor from there by clicking on the name of the playlist.
The content maintenance editor is divided into two areas. On the right side there is the vertical listing of the playlist that is currently being playlist being edited. To the left of that is an area for viewing the items that can be inserted. You usually drag and drop them from the left to the right into the list.
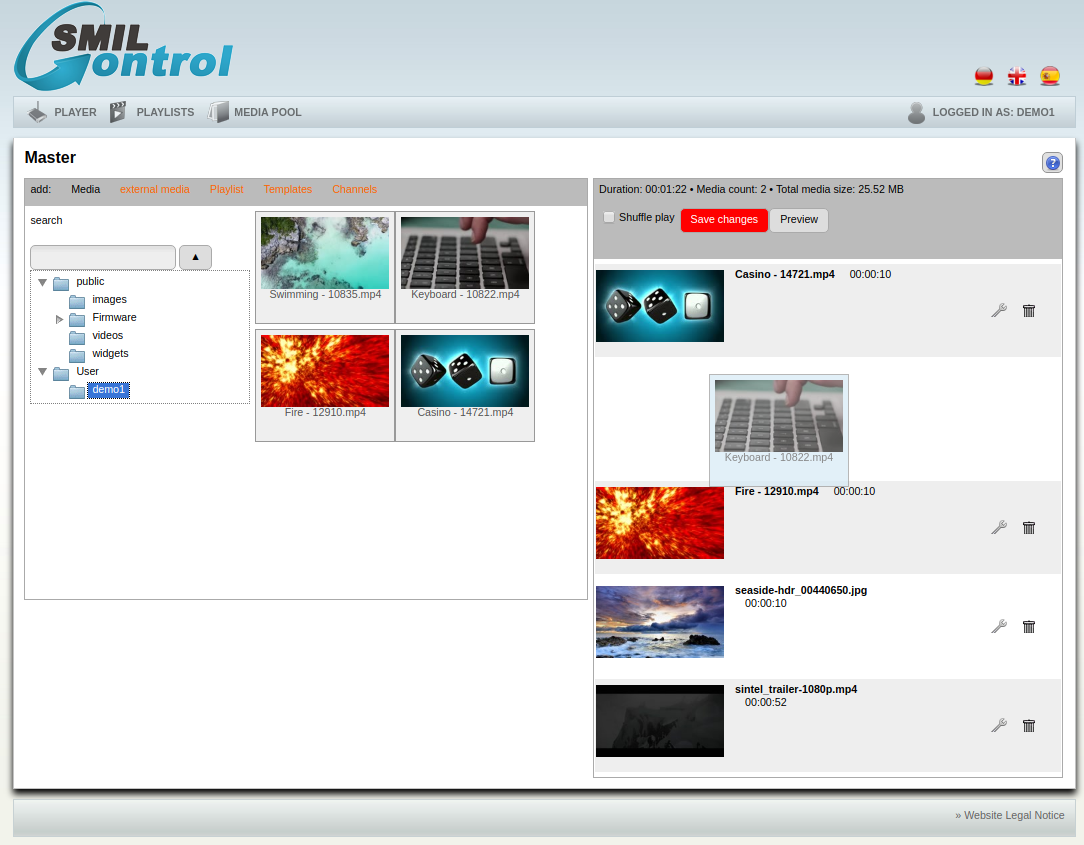
We define media as content (images, widgets, or videos) that you upload to the media pool or that someone provides to you. When you click the Media menu item, an expandable list of the directories in the media pool that you have access to appear. The optional search field hides directories to save space. A click on a directory name shows the – for playlists – usable media of this directory.
Use this to insert media elements that are not captured in content management. These are: Web pages, web streams, or any images or videos on the Internet.
For the “external media” category, specify a network address. For example. https://smil-control.de or a stream like rtsp://184.72.239.149/vod/mp4:BigBuckBunny_175k.mov.
If your device also has video inputs such as composite, HDMI-in or similar, set that there as well. This has proven useful in the hospitality industry for sporting events to display a television feed within your presentation.
The “external media” function gives you a lot of freedom. For example, you can also link to in-house videos within your protected intranet that are inaccessible from the Internet. If your media player is on the local network, it will access this address.
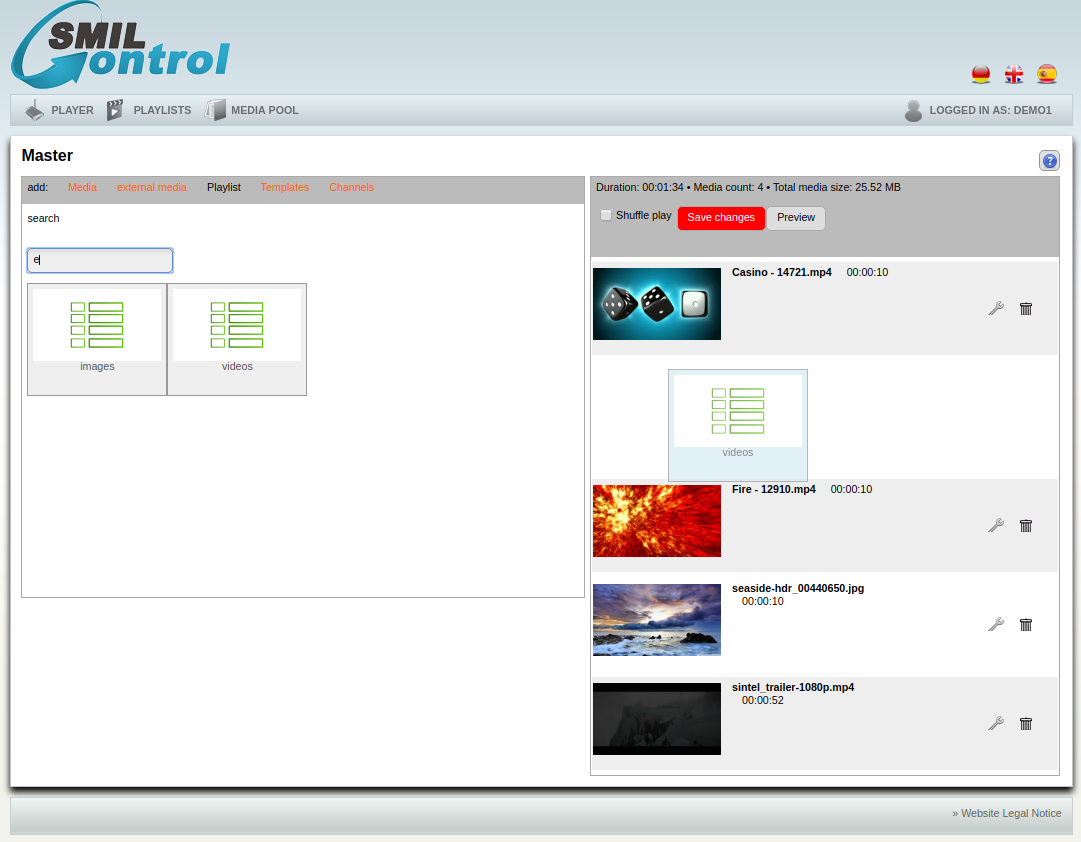
At this point, you get the opportunity to add internal playlists. Thanks to the search field, you can find insertable “internal” playlists and drag and drop them into the playlist. This way, you nest playlists in theoretically unlimited layers. This is an elegant technique to structure your presentations in many ways. It also allows you to delegate responsibility for content maintenance to different people.
Don't exaggerate the nesting. Theoretically, the player hardware only limits the level hierarchy. However, experience has shown that it becomes more difficult to maintain an overview from the 4th level onwards.
This menu item displays available templates. There are two types of templates: image templates and web templates (HTML5). Web templates are only viewable on compatible devices. Generally, all SMIL players should display HTML5 from about 2014.
Once a template is in the playlist, you can customize it with text, images, and videos (web templates only) using the pencil icon. This allows you to create a current daily offer for a product, among other things. You will find some templates for demonstration purposes. Contact us if you need specific templates for your corporate design for your project, or if you are a reseller and want to create some yourself.
This category of playlist items includes editorially managed content. This includes automatically updating news feeds, local weather, pharmacy emergency services, or manually curated playlists declared as channels. Once you drag a channel into a playlist, it is subscribed to and your presentation receives regularly updated content.
Some channel subscriptions, such as weather and pharmacy emergency services, based on location and respond to the zip code or geo-coordinates entered the player.
Drag and drop some content into your master playlist. The digital signage playlists of SmilControl are played from top to bottom. Drag-and-drop to change the playback order. The trash can deletes the respective item, and the wrench opens a dialog box to further options.
These are quite extensive, so I'll give a future tutorial a closer look at the different settings. To make the new playlist active, press the red “Save Changes” button. The button changes its color from red to gray. Your playlist is now ready to play.
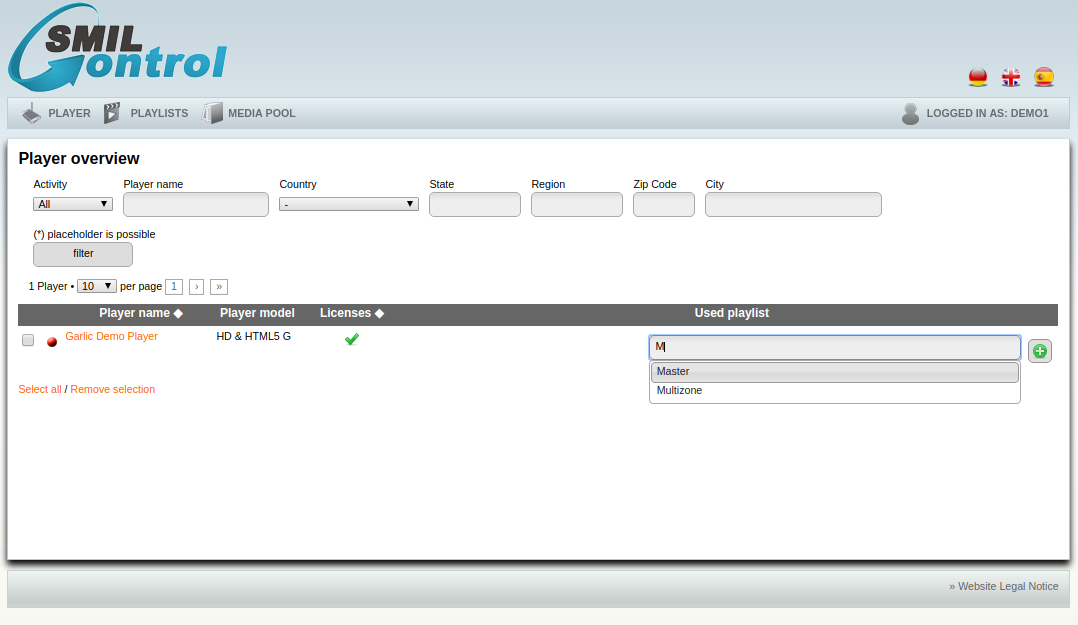
The player overview can be found under the menu item Player. If there is a player with a valid license, assign a master or multi-zone playlist to it. Multizone playlist to it. Click on the pencil button and type in the new edit field a letter that appears for the playlist.
In the “Assign Playlist” screenshot, there is one playlist named Master and one named Multizone. So, as soon as you type “M” type in, both are available for selection. Click on the playlist you want in the so-called dropdown, and it will be assigned to the player immediately.
If the playlist you want doesn't show up there, please check in the playlist's property editor to see if Master is actually set.
Your player will recognize the new assignment after 15 min at the latest, download the content and start playing it. Once a playlist is assigned, it is partially blocked for safety. You can no longer delete it or change its mode. However, you can still add, edit, or delete content.
That was easy, wasn't it? Our Digital Signage CMS has more features, of course. For example: manage devices, time triggers, create channels as well as templates, reports & statistics, group functions, license billing and more. If you have any questions or comments, just contact me.
Germany
☎ +49 (0) 511 - 96 499 560
Local court Hanover
HRB 221981
VAT-Id: DE 281 780 194