How to Connect Digital Signage Player with the SMILControl CMS
In this tutorial you will learn how to connect your digital signage player (IAdea, Garlic-Player, orcompatible) via the Internet with the SmilControl-CMS.
the Content-URL
For a player to be able to play content, it needs a so-called index. The index contains information about the location of the media to be played, where the logs are to be sent, and much more. It is comparable to the table of contents included in a book. Our indexes are based on the standardized multimedia language SMIL.
SmilControl provides a dedicated index server to retrieve SMIL indexes. You can reach it on the web via the URL http://indexes.smil-control.com. The media players usually call this address a content URL. If the device is connected to SmilControl, it regularly checks whether anything has changed. When something changed, the player downloads new index and content.
There are two ways to set the content URL: On the one side the configuration at the player or by using a config.xml file on a USB stick.
Configuration via player settings
To do this, you must select the corresponding setting menus directly on the device. For example, configuring the network of the player and entering the address (content url) of the index server.
IAdea SMIL-Media Player (Android)
With the current (July 2018) Android series from IAdea you can access the settings menu in two ways. For a short time after starting the player. Or when you move the mouse to one of the screen corners and keep the left mouse button pressed for about 10 seconds. If you use a touch screen, of course, you can also use your fingers.
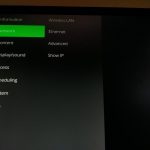
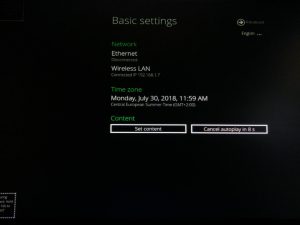
In short: You should now see the following informations about the basic settings:
Network Settings
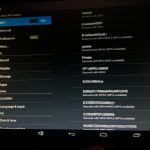
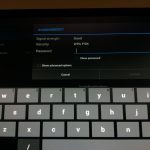
Click or tap the “Advanced” arrow in the upper right corner. An overview with different menu items appears. Via “Network” you can configure whether you want to use WiFi or normal LAN. With a click/touch on “Wireless LAN” you can access the Android settings you are probably familiar with from tables and smartphones. There you can enter the necessary data for the network.
Enter the Content-Url
There are two ways to insert the content url:
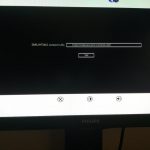
The fastest way is to do that via the basic setting in Figure 1, where you can press the “Set content” button. Enter the address of the index server http://indexes.smil-control.com in the input field that now appears and confirm it with the “Set” button
You should see the previous overview again. Now you can wait 15s until the playback process (Autoplay) starts. Then it connects to the SmilControl-CMS and displays a transfer code (see below).
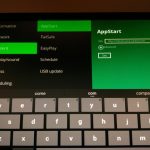
Alternatively, the content URL can also be specified via the menu item overview mentioned in the network settings. Go to “Content=>Appstart”, type the address of the index server into the field Content-URL and confirm with “Set”.
Garlic Player (Windows, Linux, Android, macOS)
The Garlic Player is a little different. The network settings are configured via the appropriate applications of the operating system (Linux, Windows, Android, macOS). That’s why we won’t go into it any further here. As soon as you start the software for the first time, you will be asked for the address of the index server via a dialog box.
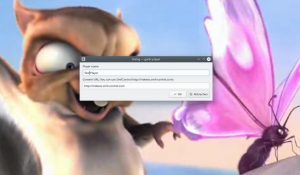
You can name the player as it will appear in the CMS and fill in the content URL. As soon as you click on “Ok” the player accept the setting. Afterwards the Garlic player will try to fetch a SMIL index on the new server.
Of course you are able to change the index server at any time, too. The dialog box required for this can also be accessed with the key combination “Ctrl-S”.
By the way: The content url of the Garlic player does not necessarily have to be a web address. It can also refer to an index in a local directory on your computer or in the intranet. e.g. /home/user/tests/index.smil
The Transfer Code
If you have configured your SMIL media player correctly, it will probably display a transfer code the first time you register with SmilControl-CMS. This is because the player is normally assigned to a user. In this case, however, the device does not know which user it belongs to. Consequently, the player is assigned to a specific user account. As soon as you register as a regular user at https://admin.smil-control.com, you can transfer the player into your account with the transfer code.
Log in with your access data and go to the menu item “Player=>Takeover”. In the field “Transfer Code” type in the sequence of characters that appears on your Digital Signage screen. Then transfer the device to your account by clicking on the button “Player transfer with transfer code”. If you have a valid license or trial license, it will be automatically assigned to the player. In other words, you can immediately start uploading media and creating a playlist.
Configuration via a USB-Stick
We offer a more convenient setting option without the intermediate step via a transfer code. For IAdea players and compatible is the SmilControl USB configuration available. It also enables you to set up multiple devices in a network with the same configuration.
Configuration at SmilControl
You need a “common” FAT formatted USB stick and an account in our CMS at https://admin.smil-control.com
There you have to click on the menu item Player and then USB-Configuration.

You can set a player name and the device series. By default, the old XMP 1×0 or 3×0 players are set. If you own one of the newer Android-based IAdea players, please select the “IAdea Android series”.
For the network connection you have the choice between normal LAN, WiFi (WLAN) and UMTS. Select your connection type and enter your WLAN or UMTS access data if necessary. In most cases, you do not need a proxy server. If you still want or need to use one, enter the appropriate settings under “Proxy Servers”.
In the USB configuration form you can also decide whether you want to use a static IP or DHCP. In general, most people use DHCP. It is also possible to enter whether and when the SMIL media player should restart itself. The devices normally restart themselves in case of errors. However, most of our customers schedule one or two reboots a week to be on the safe side.
Download and Use
If everything is set up according to your wishes, you can press the button “Download configuration file”. Hence, the CMS generates a small file called config.xml. As a result you can download and copy them into the root directory of your FAT-formatted USB stick. Be careful not to change the name. The file must be called config.xml, otherwise the device will not recognize it as a configuration file.
Now can plug the prepared stick into a USB port of your IAdea SMIL media player. As a result, the device will recognize the USB stick, read the config.xml data and reboot. As soon as this happens, remove the stick. Your player will welcome you after 1-2min with the “Connected” start screen of SMILControl. If you have a valid license or test license, it will be automatically assigned to the device. In this case you will be prompted to assign a playlist to the player.


What’s next?
In the next blog article we will explain how to create different Digital Signage Playlisten in SmilControl-CMS and assign them to the player. We will also discuss the difference between master, internal, external and multizone playlists.
If you have any questions or comments, please do not hesitate to contact us.
Open Source Developer & Co-Founder SmilControl – Digital Signage Visit me on: GitHub or LinkedIn
